
Replacing an old lawn involves more than simply laying new turf over the existing grass. The condition of the ground underneath has a major influence on how well a new lawn establishes, drains and performs over time.
Whether you are renovating a patchy backyard, replacing an unwanted grass variety or preparing a landscaping area for new turf, the basic process is the same: remove the existing lawn, inspect and prepare the soil, correct the levels and drainage, then install the new turf onto a suitable base.
This guide explains how to remove an old lawn properly and what to do before your new turf arrives.
1. Decide Whether the Existing Lawn Needs to Be Completely Removed
Not every tired-looking lawn needs to be stripped out.
If the grass is generally healthy but has a heavy layer of thatch, compacted soil or thin patches, renovation methods such as dethatching, aeration, topdressing and overseeding may be enough.
Complete turf removal is usually more appropriate when:
- the existing lawn is heavily infested with unwanted grass or weeds;
- you are changing to a different turf variety;
- the lawn level needs to be lowered or reshaped;
- the underlying soil needs significant improvement;
- you are converting lawn into garden beds, paving or another landscape feature;
- the lawn is being completely replaced rather than repaired.
If you only need to remove accumulated thatch while keeping the existing lawn, a turf cutter is generally not the right tool. A lawn dethatcher or power rake is designed for that type of renovation.
2. Plan the Job Before You Start Cutting
Before removing turf, mark the area you want to renovate and identify anything that could be damaged during excavation or cultivation.
Check for:
- irrigation lines and sprinkler heads;
- garden lighting cables;
- shallow drainage pipes;
- tree roots;
- edging;
- inspection openings and utility covers.
Do not assume these services are buried deeper than the cutting or cultivation depth of your equipment.
For larger renovation projects, also think about where the removed turf will go. Turf contains a surprising amount of soil and moisture, so even a modest lawn can produce a large volume of heavy material.
3. Mow the Existing Lawn Short
Before mechanically removing established turf, mow the lawn relatively short and remove excessive clippings.
This gives you a clearer view of the ground surface and makes the cut turf easier to handle.
If the lawn contains persistent weeds or aggressive grasses, you may also need to control the existing vegetation before removal. If using any herbicide, always follow the product label, application requirements and relevant local regulations.
4. Check Soil Moisture Before Turf Removal
Ground condition makes a major difference when using a turf cutter or sod cutter.
Very dry, hard soil can make cutting difficult, while saturated ground can become muddy, unstable and difficult to work on.
A practical target is slightly moist soil that holds together without being waterlogged.
If the ground is extremely dry, light irrigation before the job may help. Allow enough time for the water to move into the upper soil profile rather than leaving the surface wet and slippery.
5. Set the Turf Cutting Depth Carefully
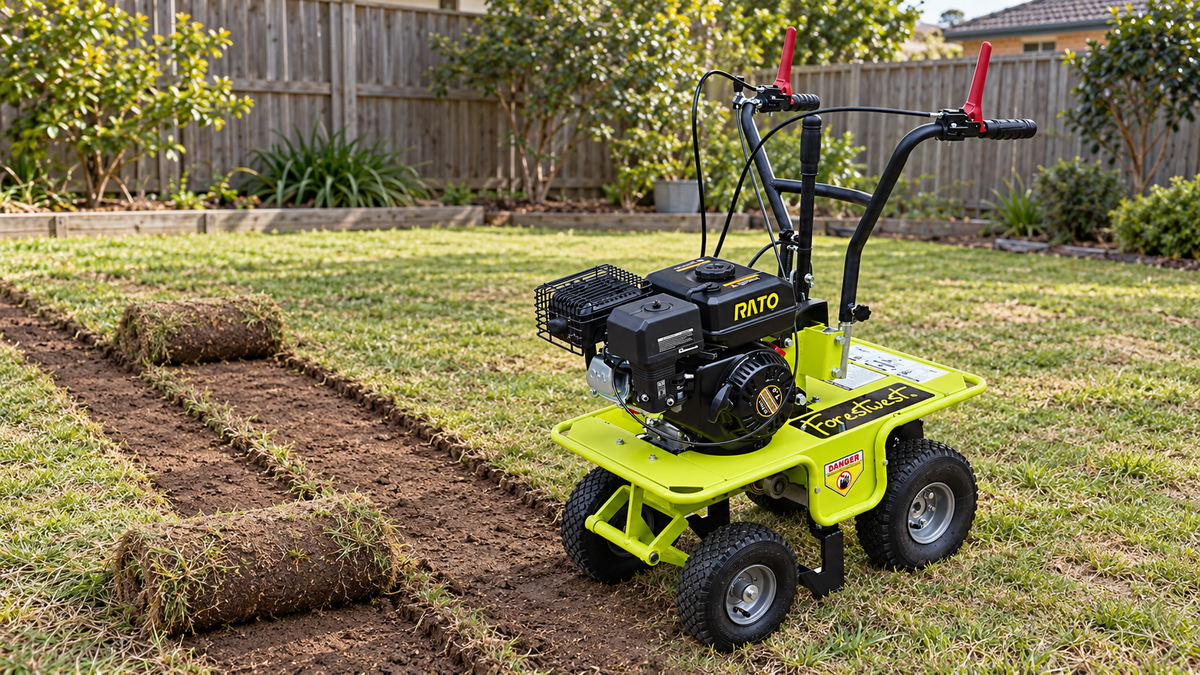
A turf cutter uses a horizontal blade to travel underneath the turf and separate the grass and root layer from the soil beneath it.
The aim is not to excavate unnecessary amounts of topsoil. Cutting too shallow may leave roots attached, while cutting unnecessarily deep creates heavier turf sections and removes more useful soil.
Start conservatively and inspect the first strip. You are looking for a clean separation underneath the main root zone.
For larger lawn replacement jobs, a self-propelled machine can make this stage much easier. For example, the Forestwest BM11166 Self-Propelled Turf Cutter uses a 305mm cutting width with adjustable cutting depth up to 35mm and two forward speeds. The important point, regardless of machine, is to adjust the depth to the actual turf and soil conditions rather than automatically using the maximum setting.
6. Cut the Lawn Into Manageable Strips
Work in straight, overlapping passes where practical.
Once a strip has been separated from the soil, cut it into manageable lengths and either roll it or lift it in sections.
Shorter sections are usually easier to handle because established turf can become very heavy once the attached soil and moisture are included.
If the turf is healthy and removed intact, you may be able to reuse it elsewhere. Otherwise, plan suitable green-waste disposal or recycling before starting the job.
7. Remove Remaining Roots, Weeds and Debris
Once the turf has been stripped, inspect the exposed ground carefully.
Remove:
- remaining grass roots and runners;
- large weeds;
- rocks and building debris;
- old roots that interfere with levelling;
- foreign material left from previous landscaping or construction.
This is an important step. Simply covering leftover weeds or unwanted grass with fresh soil does not guarantee they will disappear.
8. Decide Whether the Soil Needs Rotary Hoeing
After turf removal, do not automatically rotary hoe every site.
If the existing soil is already loose, well drained and at approximately the correct level, aggressive cultivation may not be necessary.
A rotary hoe becomes useful when the soil is:
- compacted;
- difficult to rake or level;
- being blended with organic material or soil amendments;
- being substantially reworked before installing the new lawn.
For smaller and medium-sized areas, a rear-tine machine such as the Forestwest BM11123 Dual Rotating Rear Tine Tiller can be used for soil cultivation after the existing turf has been removed.
Do not cultivate deeper simply because the machine allows it. The required working depth should be based on the actual soil problem and the finished lawn design.
9. Check Your Soil Rather Than Guessing
Before spending money on soil additives, look at what you already have.
Check:
- soil texture;
- compaction;
- drainage;
- organic matter;
- soil depth;
- pH.
For many lawn situations, a soil pH somewhere around 5.5 to 7 is commonly recommended, although the ideal range can vary with turf variety and soil conditions.
A simple pH test is inexpensive and can prevent unnecessary treatment. If you have serious drainage, salinity, clay or soil-structure problems, consider professional soil testing rather than applying products based on guesswork.
10. Improve the Soil Where Necessary
Different soil types require different approaches.
Heavy or compacted soil
Compacted soil may need cultivation and improvement before turf is laid. Drainage issues should be corrected before the new lawn goes down rather than hidden underneath it.
Very sandy soil
Sandy soils may benefit from suitable organic material to improve nutrient and moisture retention.
Poor existing soil
Where the existing base is unsuitable, a quality turf underlay may be required. The amount depends on the existing profile, site level and turf supplier's recommendations.
Australian turf-installation guidance commonly recommends a quality sandy-loam or turf-underlay base where additional soil is required. Some installations use approximately 100–150mm of prepared soil profile, but this should be considered in the context of the existing site rather than treated as a fixed rule for every lawn.
11. Get the Levels and Drainage Right
This is one of the most important parts of turf preparation.
The finished surface should drain water away from buildings and avoid low spots where water can collect.
When new turf needs to finish flush with a driveway, path or garden edge, remember that the turf itself has thickness. Australian turf guidance commonly recommends finishing the prepared soil approximately 30–40mm below the desired final level, but check the actual thickness of the turf you are ordering.
Use a rake or lawn leveller to remove bumps and hollows and establish the required fall.
12. Firm the Surface Without Over-Compacting It
The surface needs to be firm enough that it will not sink significantly after turf installation, but it should not be compacted into a hard layer that restricts root growth and drainage.
After levelling, lightly firm the area and walk over it to identify soft spots. Fill low areas and rake again as necessary.
13. Have Everything Ready Before the Turf Arrives
Fresh turf is a living product. Ideally, complete the removal, soil preparation, drainage work and levelling before delivery.
When the turf arrives:
- begin laying promptly;
- start from a straight edge where practical;
- stagger joints rather than lining them up;
- butt adjoining pieces closely without overlapping;
- avoid repeatedly walking over freshly laid sections;
- water according to the turf supplier's establishment instructions.
Common Mistakes When Removing an Old Lawn
Cutting far deeper than necessary
This removes useful topsoil and creates unnecessarily heavy turf sections.
Rotary hoeing before removing established turf
This can chop existing grass and runners throughout the soil rather than giving you a clean surface to work with. For a complete lawn replacement, turf removal normally comes first.
Ignoring drainage
A new turf variety will not solve an underlying drainage problem.
Ordering new turf before preparation is finished
Site delays leave rolled turf sitting around while you rush to finish the ground.
Assuming every lawn problem requires complete replacement
If the existing grass is fundamentally healthy, dethatching, aeration or targeted renovation may be more appropriate and less disruptive than removing the entire lawn.
A Simple Lawn Replacement Workflow
For a complete renovation, a practical sequence is:
- Assess whether complete turf removal is necessary.
- Mark irrigation, drainage and other obstacles.
- Mow and prepare the existing lawn.
- Remove the old turf.
- Remove remaining roots, weeds and debris.
- Assess soil condition and drainage.
- Cultivate compacted soil if required.
- Add suitable soil or amendments where needed.
- Check pH and correct genuine soil problems.
- Establish final levels and drainage fall.
- Lay the new turf.
- Water and maintain it according to the turf supplier's establishment program.
Final Thoughts
The quality of a new lawn depends heavily on what happens before the first roll of turf is laid. Removing the old lawn cleanly is only the beginning. Soil condition, drainage, levels and preparation all influence how successfully the new turf establishes.
Take the time to understand the site before reaching for a machine or soil amendment. A turf cutter can make large-scale lawn removal faster, while a rotary hoe can help with compacted soil afterwards, but neither replaces good planning and proper soil preparation.